
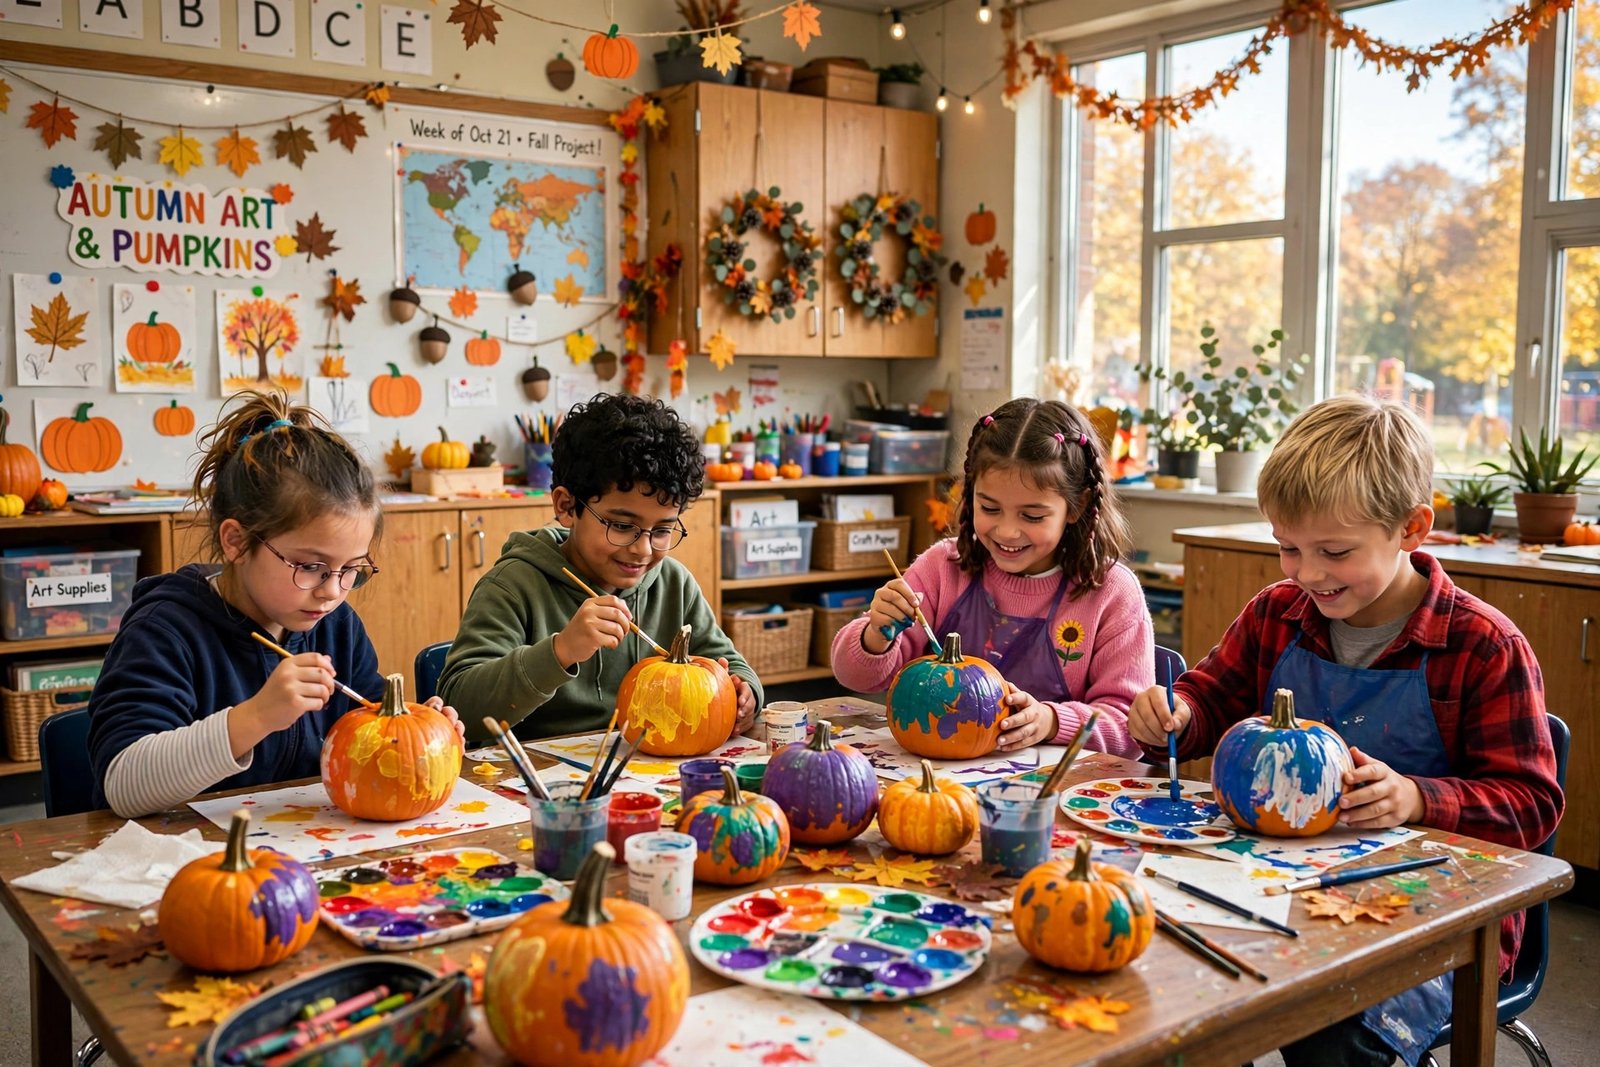

Last October, I set a small pumpkin on each table in my classroom and told my students we were going to turn them into art. Within ten minutes, one table had covered their pumpkin in orange yarn, another had glued on googly eyes the size of quarters, and a third group was arguing in the best way about whether their pumpkin should smile or frown. The room smelled faintly of paint and glue, and nobody asked what time lunch started.
That noisy, happy mess is why I keep coming back to pumpkin crafts every fall. They are cheap, they work for almost any age in elementary school, and they give kids a real reason to practice cutting, gluing, painting, and planning. The twenty ideas below are the ones I reach for year after year, and each one can be finished inside a normal class period with supplies you probably already have.
Table of Contents
Pumpkin Crafts at a Glance
| Craft | Time Needed | Materials | Best For |
|---|---|---|---|
| Paper Plate Pumpkin Faces | 20 minutes | Paper plates, orange paint, black paper, glue | Kindergarten and first grade |
| Pumpkin Handprint Art | 15 minutes | Orange and green paint, white paper | Kindergarten |
| Tissue Paper Pumpkin Collage | 25 minutes | Tissue paper, glue, cardboard pumpkin shape | First and second grade |
| Pumpkin Seed Mosaic | 30 minutes | Dried pumpkin seeds, paint, cardboard | Second and third grade |
| Yarn Wrapped Pumpkin | 25 minutes | Orange yarn, cardboard pumpkin, tape | First through third grade |
| Paper Strip Pumpkin | 30 minutes | Orange and green paper strips, stapler, glue | Second through fourth grade |
| Pumpkin Suncatcher | 20 minutes | Clear contact paper, tissue paper, black paper | Kindergarten through second grade |
| Folded Paper Pumpkin | 25 minutes | Orange paper, scissors, glue, green paper | Second through fourth grade |
| Pumpkin Bookmark | 15 minutes | Orange cardstock, markers, ribbon | Third through fifth grade |
| Pumpkin Pop Up Card | 30 minutes | Cardstock, scissors, glue, markers | Third through fifth grade |
| Painted Rock Pumpkins | 30 minutes | Smooth rocks, orange paint, green paint | Second through fifth grade |
| Thumbprint Pumpkin Patch | 20 minutes | Orange paint, green paint, white paper | Kindergarten through second grade |
| Pumpkin Faces with Buttons | 25 minutes | Orange paper pumpkins, buttons, glue | First through third grade |
| Glitter Glue Pumpkin Art | 25 minutes | Black paper, orange glitter glue, white chalk | Third through fifth grade |
| Sponge Painted Pumpkins | 20 minutes | Sponges, orange paint, paper | Kindergarten and first grade |
| Pumpkin Counting Craft | 30 minutes | Orange paper, number cards, glue | Kindergarten and first grade |
| Pumpkin Life Cycle Wheel | 35 minutes | Paper plates, markers, brad fastener | Second through fourth grade |
| Pumpkin Story Stones | 30 minutes | Smooth stones, paint, markers | Second through fifth grade |
| Pumpkin Leaf Rubbing Art | 25 minutes | Leaves, crayons, orange paper | First through third grade |
| Class Pumpkin Patch Mural | 40 minutes | Large paper, paint, paper pumpkins | All elementary grades |
Simple Pumpkin Crafts to Start the Day
These first five crafts are easy to set up and hard to get wrong. I use them on busy mornings, on the day before a holiday, or when I need an activity that works for the whole class at once. They build cutting and gluing skills without asking kids to follow ten steps in a row.
1. Paper Plate Pumpkin Faces
Give each child a paper plate and orange paint, then let them paint the whole plate and set it aside to dry. While it dries, they cut a green stem and two leaf shapes from construction paper and a face from black paper. Once the plate is dry, they glue the stem at the top, the leaves beside it, and the face in the middle. Let the kids design their own faces because a silly face keeps them far more engaged than a copy of yours. This craft also makes a bright hallway display.
2. Pumpkin Handprint Art
Paint the palm of each child orange and press it flat onto white paper, then paint their thumb green and press it at the top for a stem. When the paint dries, they add a curly vine with a green marker and a small smile with a black marker. Label each handprint with the child name and date so parents can see how much those little hands grew by spring. This one takes almost no prep, and younger kids love seeing their own hand turn into a pumpkin.
3. Tissue Paper Pumpkin Collage
Cut a large pumpkin shape from cardboard for each child, then hand out small squares of orange, yellow, and red tissue paper. Kids brush glue over one small section at a time and press the tissue squares down, overlapping the edges until the whole shape is covered. Work in small sections so the glue does not dry before the paper goes on. Add a brown paper stem and a green leaf at the end. The finished pumpkins look rich and textured, and no two ever turn out the same.
4. Pumpkin Seed Mosaic
Save and dry pumpkin seeds from a class pumpkin, then let kids paint them orange, yellow, and green in small cups. Once the seeds are dry, they glue them onto a cardboard pumpkin outline in rows or in a simple pattern they planned first. Sort the seeds by color before gluing so kids can plan a pattern instead of grabbing at random. This craft takes a little patience, and it is a good fit for a quiet afternoon when you want kids to slow down and focus.
5. Yarn Wrapped Pumpkin
Cut a pumpkin shape from sturdy cardboard and cut a small notch at the top edge. Tape the end of orange yarn to the back, then let kids wrap the yarn around and around until the front is covered. They can switch to green yarn near the top for a stem area. Tape the yarn end down often so loose wraps do not slide off while kids work. This craft builds fine motor strength, and it works well for kids who need a calm, repeatable task with a clear finish line.
Paper Pumpkin Crafts for Busy Hands
Paper crafts are my backup plan for rainy days and short periods. The supplies are cheap, the mess stays small, and kids can take the finished piece home the same day. These five ideas use paper in different ways, so the class does not feel like it is repeating the same cut and paste job.
6. Paper Strip Pumpkin
Cut orange construction paper into strips about one inch wide and ten inches long, then give each child six strips plus one green strip. Kids staple or glue the orange strips together at both ends so they fan out into a round pumpkin shape, then curl the green strip into a stem. Fan the strips out evenly before you fasten the top, or the pumpkin will lean to one side. Hang these from the ceiling with string and the room fills up fast with color.
7. Pumpkin Suncatcher
Cut a pumpkin frame from black construction paper, then stick clear contact paper sticky side up behind the frame. Kids press small pieces of orange, yellow, and red tissue paper onto the sticky surface until the center is full. Press the tissue flat with a fingertip so light can pass through without cloudy air pockets. Trim the extra contact paper, punch a hole at the top, and hang the suncatcher in a window. The light through the tissue makes even a simple design look lovely.
8. Folded Paper Pumpkin
Fold a sheet of orange paper in half, then cut a half pumpkin shape along the fold so it opens into a full pumpkin. Kids cut slits from the outer edge toward the center without cutting all the way through, then fold every other strip inward to add depth. Glue a green paper stem and a curled vine on top. Cut the slits slowly and evenly because rushed cuts tear the paper and flatten the shape. This one looks fancier than it is, and older kids enjoy the folding puzzle.
9. Pumpkin Bookmark
Cut orange cardstock into a tall rectangle, round the top corners, and cut a small notch at the top for a stem shape. Kids draw a friendly face with markers, add a green paper leaf, and punch a hole for a short ribbon. Write the child name on the back so bookmarks find their way home after reading time. This is a fast craft that still feels useful, and it pairs well with a fall reading list or a library visit.
10. Pumpkin Pop Up Card
Fold a piece of cardstock in half for the card base, then cut a second smaller piece of orange paper into a pumpkin shape with two tabs at the bottom. Kids glue the tabs inside the fold so the pumpkin pops up when the card opens. They draw a face, add a stem, and write a short fall message inside. Test the fold before gluing so the pumpkin stands up straight instead of leaning forward. Kids love handing these to a friend or a family member.
Painted and Decorated Pumpkin Crafts
Paint brings out the boldest work in my room. These five crafts let kids mix colors, try new tools, and make something that looks different from a worksheet. Put newspaper down first, hand out smocks or old shirts, and let them enjoy the mess.
11. Painted Rock Pumpkins
Give each child a smooth, clean rock and orange acrylic or tempera paint. Kids paint the whole rock orange, let it dry, then add a green stem on top and a simple face with black paint or a marker. Paint two thin coats instead of one thick coat so the color dries faster and does not crack. These rock pumpkins sit nicely on a desk or a windowsill, and they last far longer than a paper craft. I keep a small basket of them near our reading corner all fall.
12. Thumbprint Pumpkin Patch
Put orange paint on a paper plate and show kids how to press one thumb into the paint and then onto white paper to make a small round pumpkin. They repeat the print in a row to build a patch, then use a green marker to add stems and vines between the prints. Wipe the thumb between colors so the green stem paint stays clean and bright. This craft works well for a group poster too, with each child adding a row of pumpkins to a shared sheet of paper.
13. Pumpkin Faces with Buttons
Cut large pumpkin shapes from orange construction paper and set out a tray of buttons in black, brown, and yellow. Kids glue buttons on as eyes, a nose, and a mouth, then add a paper stem and leaf. Sort buttons by size first so kids can plan a face with big eyes and a small nose, or the other way around. The buttons add texture and weight, and kids who struggle with drawing a face often do their best work with this hands on version.
I tried this in my class last month, and here is what happened. I put the buttons in one big tray and expected a calm sorting activity. Instead, three kids started trading buttons like coins, one boy built a face with six eyes, and a quiet girl in the back made the neatest pumpkin in the room using only brown buttons. I learned to sort the buttons into small cups first, and the next time we did it, every child finished in twenty minutes with far less fuss.
14. Glitter Glue Pumpkin Art
Give each child black construction paper and orange glitter glue. Kids draw a large pumpkin outline with the glitter glue, then fill the inside with curved lines, dots, or a simple pattern. White chalk can add a stem and a few stars around it. Let the glitter glue dry flat overnight because moving it too soon smears the lines. This craft looks best in a dark hallway or near a window, and it is a good choice when you want a quiet, focused art session.
15. Sponge Painted Pumpkins
Cut kitchen sponges into small squares and pour orange paint into shallow trays. Kids dab the sponge in paint and press it onto white paper inside a pumpkin outline, building up color in layers. They can add yellow paint at the edges for a warm glow. Dab, do not drag the sponge or the color turns muddy and flat. Add a brown paper stem when the paint dries. This is a great first painting activity for kindergarten because the tool is easy to hold and the result always looks good.
Pumpkin Crafts That Teach Something Too
These last five crafts sneak in counting, science, or storytelling while kids are busy making something fun. I use them when I want the art time to support a lesson we already started, not replace it. Kids rarely notice they are practicing a skill because the craft comes first.
16. Pumpkin Counting Craft
Cut five small pumpkin shapes from orange paper and number them one through five. Kids glue the pumpkins in order on a strip of paper, then draw the matching number of seeds or dots on each pumpkin. Check the order before gluing so the numbers run one to five from left to right. This craft fits a math center or a small group lesson, and it gives younger kids a pumpkin they can count on again later in the week.
17. Pumpkin Life Cycle Wheel
Cut two paper plates into circles, then cut a small window in the top plate. Kids draw four stages on the bottom plate, a seed, a sprout, a flower, and a pumpkin, then fasten the plates together in the center with a brad. Turning the top plate reveals each stage in order. Draw the stages in a circle before you fasten the plates so each picture lines up with the window. This wheel makes a tricky science idea easy to hold in your hands and retell.
18. Pumpkin Story Stones
Give each child three smooth stones and orange, green, and black paint. Kids paint a pumpkin on one stone, a leaf on the second, and a moon or a star on the third. Once the paint dries, they use the stones to tell a short fall story out loud or to a partner. Keep the pictures simple and bold so they read clearly from across a table. This craft builds speaking skills, and it works well in a literacy center where kids can retell the same story in a new way each time.
19. Pumpkin Leaf Rubbing Art
Collect a few real leaves with clear veins, place them under a sheet of white paper, and rub the side of a crayon over the top until the leaf shape appears. Kids cut the rubbed leaves out and glue them around an orange paper pumpkin as a fall border. Tape the leaf down first so it does not slip while kids rub. This craft gets kids outside for a short leaf hunt, and it connects art to the season in a way that feels real instead of copied from a poster.
20. Class Pumpkin Patch Mural
Tape a large sheet of paper to the wall and paint a green field and a blue sky across it. Each child makes one paper pumpkin using any method they liked from this list, then glues it onto the mural with their name nearby. Leave space between pumpkins so every child can find their own work on the wall. This is the craft I save for the last week of October because it pulls the whole month together, and parents always stop to look at it during pickup.
Frequently Asked Questions
How much time should I plan for a pumpkin craft in class?
Plan twenty to thirty minutes for most of these crafts, plus five minutes for setup and five minutes for cleanup. Short crafts like the thumbprint patch or the bookmark fit a single short period, while the mural or the life cycle wheel need a full lesson block. Always test the craft yourself once before class so you know where kids might get stuck.
What ages are these pumpkin crafts best for?
Kindergarten and first grade do best with the handprint art, the sponge painting, and the counting craft. Second and third grade can handle the yarn pumpkin, the paper strip pumpkin, and the story stones. Fourth and fifth grade enjoy the pop up card, the glitter glue art, and the life cycle wheel because those crafts ask for more planning and fine detail.
How do I keep the mess under control during pumpkin crafts?
Cover tables with newspaper or a plastic cloth, hand out smocks or old shirts, and put paint in small trays instead of large cups. Keep wipes nearby and give a clear cleanup job to each table, like one child collects scissors while another stacks paper. Kids clean up faster when the job is small and named.
What if I do not have real pumpkins or pumpkin seeds?
You do not need real pumpkins for any of these crafts. Paper, paint, yarn, and buttons cover all twenty ideas, and dried beans or orange beads can stand in for seeds in the mosaic. The only craft that uses real seeds is the mosaic, and it works just as well with paper dots if seeds are not available.
Can I use these crafts for a fall festival or parent night?
Yes, and the mural, the paper strip pumpkins, and the suncatchers make the best displays because they are bright and easy to see from a distance. Label each piece with the child name and grade, and put the FAQ favorites near the entrance so parents can see what the class made. Send the bookmarks and pop up cards home instead of hanging them up.
How do I adapt a craft for kids who finish early or need extra help?
Keep a simple extra job ready, like cutting extra leaves, adding a border, or writing a sentence about the pumpkin on the back. For kids who need help, pre cut the tricky shapes, pair them with a buddy, or offer a thicker crayon or a larger brush. The goal is a finished piece every child can feel proud of, not a race to the same result.
How should I store or display finished pumpkin crafts?
Flat paper crafts store well in a folder or a large envelope with the child name on the front. Hang suncatchers and paper strip pumpkins with string, and set rock pumpkins on a shelf where they will not roll off. Take a photo of the mural before you take it down, because a big class display rarely survives the move to storage in one piece.
Final Thoughts
Pumpkin crafts work because they are simple, seasonal, and open ended. Kids get to make real choices about color, faces, and patterns, and you get a room full of art that actually looks like fall. Start with one easy craft from the first group, keep the supplies simple, and let the kids surprise you with what they invent.
You do not need a perfect pumpkin or a perfect lesson plan. You need a table covered in newspaper, a pile of orange paper, and twenty minutes where kids can cut, glue, and paint without worrying about a right answer. Try one craft this week, see how your class responds, and save the rest for the days when you need something joyful and low stress. Your students will remember the messy, happy afternoon far longer than they remember the worksheet that came after it.
