
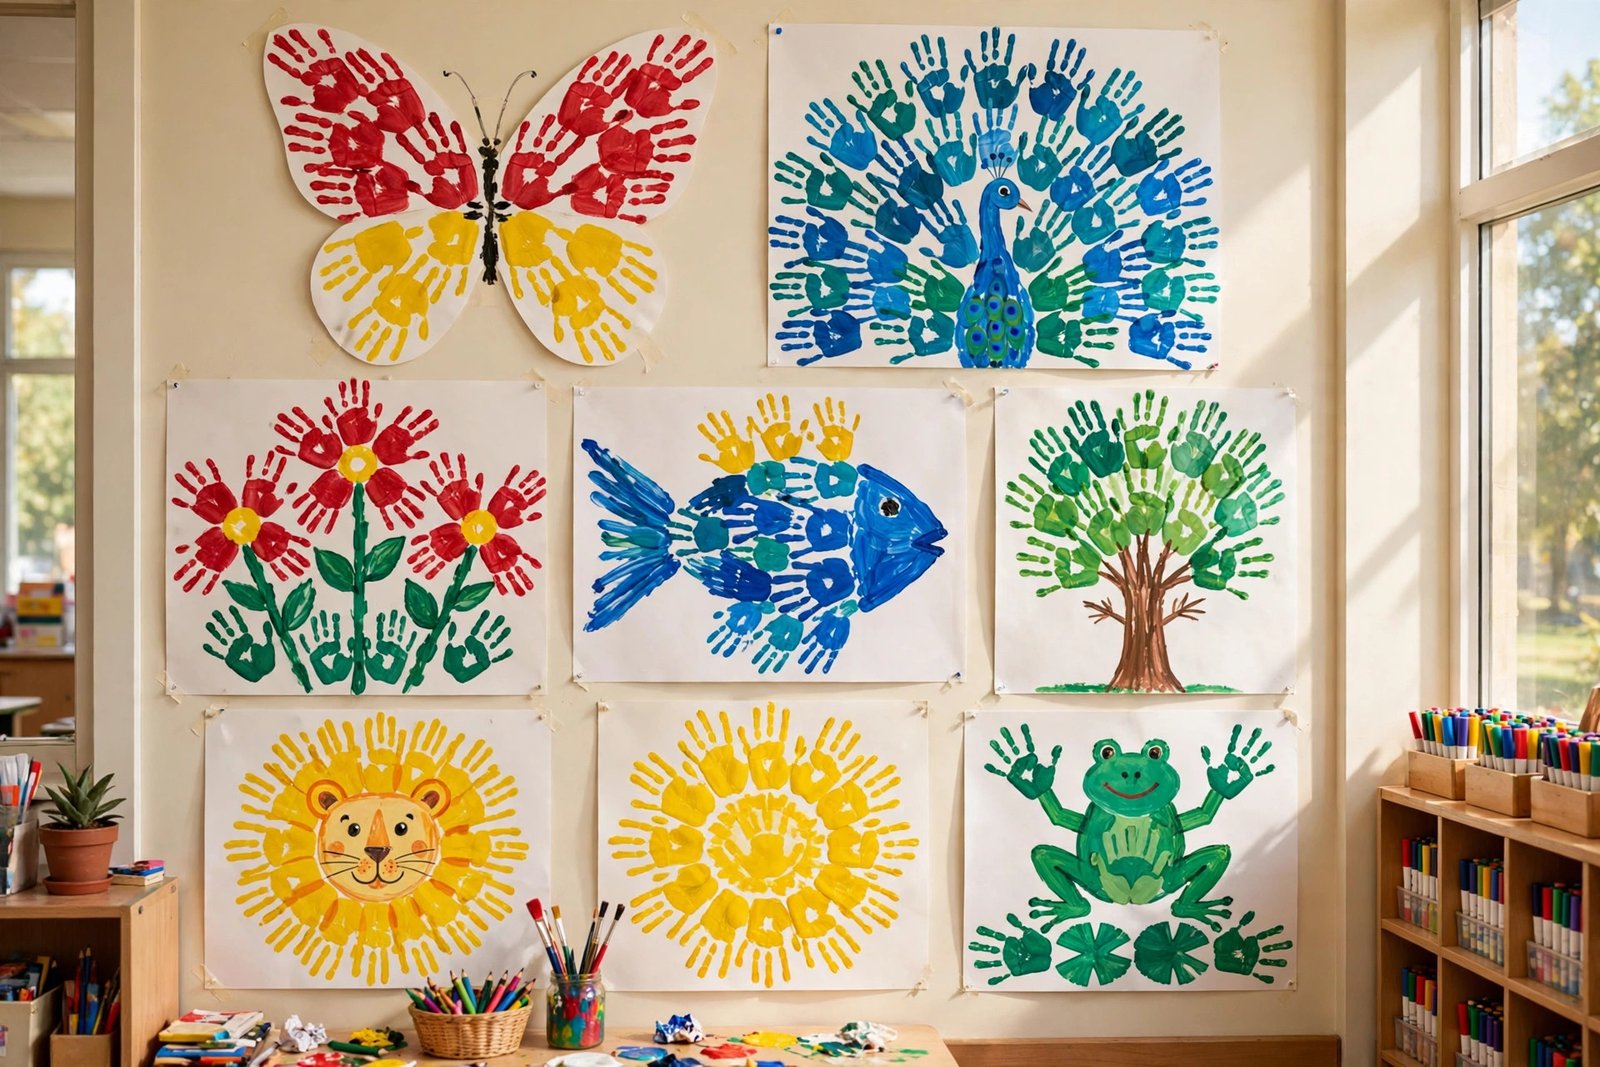

What do you do when a whole class of first graders holds up paint-covered hands and asks what comes next? You could hand out plain paper and hope for the best, or you could turn those painted hands into something worth keeping. Handprint crafts sit right in that sweet spot for elementary teachers. They are simple enough for a five year old, open enough for a ten year old to add real detail, and they leave you with art that parents actually want to save. A handprint also does quiet work behind the fun. It builds fine motor control as children spread their fingers and press down with care. It teaches color mixing when red and yellow meet on one palm. It gives shy students a clear starting point, because the shape is already there on the page and the rest is choice. The fifteen ideas below cover quick fillers, seasonal displays, animal art, and keepsakes that go home in backpacks with pride. Most use the same short supply list, so you can run them all year without a new shopping trip. Each craft below lists the materials in plain words and walks through the steps in order. You will not find tricky folds or tools your room does not already have. If a step feels too fussy for your grade, trim it. A younger class can stop after the print, and an older class can add labels, patterns, or a short caption about what they made. That range is what makes handprint art last from kindergarten through fifth grade. Read the table first, pick the mess level your day can handle, and let the paint do the talking.
Table of Contents
Pick the Right Craft in One Minute
Not every handprint craft fits every day. Some dry in minutes and suit a packed Friday afternoon. Others need drying space and a second session for details. Use this table to match the craft to your class, your time, and your tolerance for paint on sleeves. Start with a low mess craft if this is your first handprint lesson, then work up to the bigger keepsakes once your routine is set.
| Craft | Best Age | Mess Level | What You Need |
| Sunflower handprint | 5 to 7 | Low | Yellow and brown paint, green paper, glue |
| Butterfly handprint | 5 to 8 | Low | Two paint colors, paper, markers |
| Fall tree handprint | 6 to 9 | Medium | Red, orange, and yellow paint, brown paper |
| Snowman handprint | 5 to 8 | Medium | White paint, black paper, orange paper |
| Turkey handprint | 6 to 9 | Medium | Brown, red, and orange paint, paper |
| Crab handprint | 6 to 8 | Medium | Red paint, paper, wiggly eyes, glue |
| Family tree handprint | 7 to 10 | Medium | Brown paint, green paint, paper, markers |
| Wreath handprint | 6 to 10 | High | Green paint, red paper, ribbon, glue |
Quick Crafts That Dry Fast
Some days you have twenty minutes and a room full of energy. These four crafts fit that kind of day. Each one uses one or two colors, dries fast, and still looks finished enough for the hallway wall. Keep the paint thin, press once, and let the shape speak. Older students can add patterns or labels, while younger students can stop right after the print and still feel proud.
1. Handprint Sunflowers
Paint the palm and fingers yellow with a brush, and leave the middle of the palm bare. Press the hand onto white paper with fingers spread wide, then lift straight up so the petals stay clean. Paint a brown circle in the center of the palm print once the yellow is dry. Cut a green stem and two leaves from construction paper and glue them under the flower. Add a simple brown center with dots made by a fingertip. This craft works well for a summer board or a lesson about how plants grow toward light.
2. Handprint Butterflies
Paint one hand with two colors, one color on the thumb side and one on the pinky side, and press it onto folded paper to make one wing. Repeat with the other hand on the other side to make a matching wing. Let the paint dry, then draw a thin body down the center with a black marker and add two antennae. Stick on wiggly eyes or draw small eyes with a marker. Cut around the wings for a free standing butterfly, or leave the sheet flat for a display. Children love choosing wild color pairs.
3. Handprint Fish in a Paper Pond
Paint the whole hand blue or orange and press it sideways on light blue paper so the fingers point like a tail. Add a wiggly eye near the thumb and draw a small smiling mouth with a marker. Paint a few round bubbles above the fish with a fingertip dipped in white paint. Tear green paper into thin strips for seaweed and glue them along the bottom edge. Make three fish on one sheet for a pond scene, or let each child make one fish and join them on a class mural.
4. Handprint Cactus in a Pot
Paint the hand green and press it onto white paper with fingers pointing up, then repeat with the other hand slightly lower so the arms overlap. Draw a clay pot under the prints with brown and orange markers, and add small dots or short lines for cactus spines. Glue a small pink paper flower on top of one finger for a bloom. Write the child name and date on the pot so it works as a keepsake. This one suits a desert plant lesson and looks bright on a spring display wall.
Seasonal Handprint Crafts
Seasons give handprint art a natural reason to change. Fall leaves, winter snow, spring flowers, and autumn harvests all map well onto small hands. These four crafts work as hallway displays because the colors are bold and the shapes read well from across the room. Plan them a week ahead so paint has time to dry before you add paper details or hang the work.
5. Handprint Fall Tree
Paint a brown tree trunk and three branches on white paper with a brush, and let it dry while children wash their hands. Paint each hand in red, orange, or yellow, and press prints around the branches to form the leaves. Layer two or three prints on each side so the crown looks full. Add a few fingerprint dots in gold paint for falling leaves near the bottom. Older students can label the parts of a tree on the same page, which turns the art into a science page worth keeping.
6. Handprint Snowman
Paint the palm and fingers white and press the hand onto black or dark blue paper with fingers pointing down. Add a black paper hat on top of the thumb print, and glue on two small black paper circles for eyes. Cut a small orange triangle from paper for a carrot nose and glue it under the eyes. Draw stick arms and a row of coal buttons with a black marker. Sprinkle a little white paint with a dry brush for snow, and write the child name in white marker along the bottom edge.
7. Handprint Turkey
Paint the palm brown and each finger a different fall color, then press the hand onto white paper with fingers fanned out like feathers. Paint the thumb brown too, and press it again lower down to form the turkey body. Glue on a small orange beak, two wiggly eyes, and a red paper wattle under the beak. Add paper legs with a marker, and write a short thank you note on the same page if you use this before a holiday break. This is a class favorite because every turkey comes out a little different.
8. Handprint Spring Flower Bouquet
Paint each hand a different bright color and press three or four prints on one sheet with fingers spread like petals. Paint a green circle in the center of each palm print once the petals are dry. Draw green stems from each flower down to the bottom of the page with a marker. Cut a paper bow or ribbon shape and glue it where the stems meet. Add grass with short green strokes along the bottom edge. This bouquet makes a kind gift for a family member and fits a spring art show well.
Animal Handprint Crafts
Animals turn handprints into characters, and children love spotting the animal hiding in their own hand shape. Fingers become legs, ears, wings, or claws with a few paper shapes and a marker. These four crafts lean on simple color choices, so the paint station stays easy to run. Give each child a small mirror or a sample page so they can see where the eyes and ears should go.
9. Handprint Crab
Paint both hands red and press them side by side on white paper with fingers pointing outward like claws. Paint a red oval between the prints for the crab body, and glue on two wiggly eyes on short paper stalks. Draw a wide smile and a few small lines for legs with a black marker. Cut a strip of yellow paper for sand and glue it along the bottom edge. Add blue waves at the top with a brush. This crab looks cheerful on an ocean display and pairs well with a short book about sea animals.
10. Handprint Owl
Paint the hand brown and press it onto light paper with fingers pointing up like feathers. Glue on two large white paper circles for eyes, then add smaller black circles inside for pupils. Cut a small orange triangle for a beak and glue it between the eyes. Draw two small feet at the bottom with an orange marker, and add a paper branch under the owl. Older students can add belly feathers with short marker strokes, while younger students can stop after the eyes and beak. The result looks wise and a little funny, which children enjoy.
11. Handprint Dinosaur
Paint the hand green and press it sideways on white paper so the fingers point like a long tail and the thumb points up like a head. Draw spikes along the top with a darker green marker, and add a small eye near the thumb. Paint a few round spots on the body with a fingertip dipped in yellow paint. Draw four short legs under the body and a ground line in brown. Let each child name their dinosaur and write the name on the page. This craft fits a dinosaur week and sparks plenty of talk.
12. Handprint Penguin
Paint the palm black and press it onto white paper with fingers pointing down, then paint a white oval on the palm print for the belly once the black is dry. Glue on two wiggly eyes near the top, and cut a small orange triangle for a beak. Draw two orange feet at the bottom with a marker, and add a small paper scarf in a bright color. Paint a few white dots around the penguin for falling snow. This penguin works for a winter display, and the black and white contrast makes it easy for young children to follow.
Keepsake Crafts Parents Love
Keepsakes are the handprint crafts that go home and stay on a fridge for years. They work because they capture a size that will never come back. A small hand in September looks tiny by June, and parents notice that change at once. These three ideas take a little more time, so save them for a special week or a family event. Use good paper, write the date clearly, and let the paint dry fully before the work goes into a backpack.
I tried the handprint wreath with my second graders last December, and the first round came out smeared because I loaded the brush with too much green paint. The prints looked like blobs, and two children were upset that their wreaths did not look like the sample. I wiped the hands, switched to a thin coat with a sponge brush, and pressed once without wiggling. The second round came out clean, and the class was proud enough to hang them in the hall that same day. That small fix changed the whole lesson.
13. Handprint Family Tree
Paint a brown trunk and branches on a large sheet of paper, and let it dry before any handprints go on. Paint each family member hand in a different shade of green, and press the prints around the branches to form the leaves. Write each person name under their print with a fine marker, and add the year near the trunk. Glue on a few small paper apples or flowers if the tree feels bare. This craft makes a warm gift for a family member and gives children a gentle way to talk about the people in their home.
14. Handprint Wreath
Paint both hands green with a thin coat and press them in a circle on white paper, overlapping each print a little so the ring looks full. Leave a clear hole in the center, and keep going until the circle closes. Glue on small red paper circles for berries and cut a red bow from paper for the bottom of the wreath. Add a short loop of ribbon at the top so the wreath can hang on a wall or a door. Write the child name and year on the back so the keepsake stays dated for years.
15. Handprint Heart Card
Fold a sheet of red or pink card in half to make a card, and paint one hand in a soft color. Press the hand on the front with fingers pointing up, then press the other hand beside it so the thumbs meet at the bottom and form a heart shape. Draw a thin outline around the heart with a marker once the paint is dry. Write a short message inside the card with help from the child, and let them sign their name in their best handwriting. This card suits a family celebration and costs almost nothing to make.
How to Set Up a Handprint Station That Stays Calm
A calm handprint lesson starts before the paint comes out. Set up one table as the paint station and keep the rest of the room paint free. Lay newspaper or a plastic sheet on the table, and place one tray of paint per color with a brush in each tray. Put a stack of paper on one side and a drying rack or a line with clips on the other side. Ask children to come to the station in small groups of four or five, while the rest of the class works on a quiet drawing task. This one change keeps the line short and the noise low.
Teach the press and lift move before anyone touches paint. Show how to spread fingers wide, press the whole hand down flat, and lift straight up without sliding. A slide is what turns a clear print into a smear, so practice the lift on a scrap sheet first. Keep baby wipes or damp cloths at the station, and teach children to wipe hands before they walk back to their seats. Smocks or old shirts help, and a clear rule about paint staying at the station saves desks and sleeves.
Plan the drying space as carefully as the paint table. Wet prints need flat space or a rack where nothing touches them, and a full class set takes more room than most teachers expect. Hang finished work with clips or lay it on a counter in a single layer. Write names on the back or in a corner before the paint goes on, because a wet page is hard to label later. When the routine is set, a handprint lesson can run in under thirty minutes, and cleanup takes less time than the art itself. Keep the paint thin, keep the groups small, and keep the wipes close, and the station will stay calm enough to run again next week.
Frequently Asked Questions
How do I keep paint off clothes and desks
Cover the table with newspaper or a plastic sheet, and ask children to wear smocks or old shirts before they come to the station. Keep paint at one table only, and place wipes right beside the trays so hands get cleaned before children walk away. A thin coat of paint also helps, because thick paint drips and spreads to sleeves and cuffs.
What paint works best for handprints
Washable tempera paint works best for most classrooms because it spreads well, dries fast, and washes off skin and clothes with soap and water. Use a brush or a sponge to coat the hand in a thin even layer, and avoid paint straight from a squeeze bottle, which piles on too thick. Test one print on scrap paper first, and add a little water if the paint feels sticky.
How do I help a child who does not want paint on their hands
Offer a choice instead of pushing the child to join in. Let them paint with a brush, press a sponge shape, or trace their hand with a marker while others print. Some children dislike the cold or sticky feel, and that feeling is real for them. A gentle option keeps them part of the lesson without a struggle, and many will try a print next time.
How long do handprint crafts take to dry
A thin handprint on plain paper dries in about ten to twenty minutes in a warm room with good air flow. Thick paint, dark colors, and glossy paper all slow drying, so keep coats thin and use plain paper when you can. Leave finished work flat or clipped to a line, and avoid stacking wet pages. If you must send work home the same day, slip each page into a folder so it stays flat.
Can I use handprint crafts with a large class
Yes, if you run the paint station in small groups while the rest of the class works on a seated task. Call four or five children at a time, and keep the paint trays ready so each group moves fast. A parent helper or a teaching aide makes the station smoother, but the small group routine works even on your own. Plan for about five minutes per group, and the whole class can finish in one lesson.
How do I store or send finished crafts home safely
Let every piece dry fully before it goes into a backpack, and slip it into a folder or a large envelope so it stays flat. Write the child name and date on the back in pencil so the front stays clean. For keepsakes, use thicker paper or card so the work holds up over time. A quick note home about what the class made helps parents know why the art matters.
Final Thoughts
Handprint crafts earn their place in an elementary classroom because they are simple, joyful, and honest. A child presses a painted hand onto paper, and a sunflower, a crab, or a wreath appears. That small moment builds confidence, and the finished piece gives the child something real to show for it. You do not need fancy tools or a long supply list. You need washable paint, plain paper, a clear station, and a little patience with drying time. Start with one low mess craft, learn how your class moves through the station, and then try a keepsake when the routine feels steady. Keep the paint thin, keep the groups small, and keep the names and dates on every piece. Years from now, a parent may still have that small handprint tucked in a drawer, and that is a fine reason to bring out the paint again.
